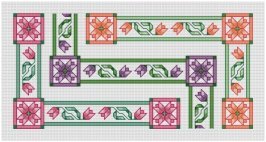
Cross Stitch Borders
Just like alphabets,
here's how cross stitch borders can give you
endless opportunities
to create your own, unique cross stitch designs!
It is becoming more and more popular to cross stitch a quotation, a verse, or even song lyrics that hold a special meaning. And when you are stitching a name or a short, familiar saying, you can choose letters that are elaborate and decorative. From a design perspective, then, these can then stand alone.
However, when stitching longer text, you may have to pass over the ornamental lettering for a cross stitch alphabet that is more readable. The challenge then becomes how to transform your favorite words into a finished cross stitch design.
Or maybe you've seen a portion of another design that is perfect - but just not all of it. It's easy enough to stitch the parts of the cross stitch design that fits your needs, but often, it just doesn't quite look complete.
Cross stitch borders are the answer!
Cross stitch borders can be
- as simple as a backstitched lines in a particular shape or pattern,
- elaborate designs with a variety of complex stitches, and
- everything in between.
If you
are cross stitching an image, then choose a border that complements it. Avoid a borders that pull your eye away from the central design. When you do it right, the border and the image it surrounds should look like they were originally designed to be together--either would look incomplete without the other.
A delicate border composed of backstitched scrollwork would disappear when surrounding cross stitched wildlife. Likewise, a heavy, geometric border would overpower an elegant love sonnet.
A border can have images that depend on using specific floss colors. If you choose one like this, adapt the colors in your central design to coordinate with the surrounding border. If you plan to stitch a verse, and you fall in love with a cross stitch border, look for an alphabet that belongs with the design.
Cross stitch borders can be the finishing touch or an integral part of your cross stitch design.
Have fun experimenting!
Borders often have a repetitive pattern--this makes it easy to adjust the size. They can also have a coordinating design motif that is a little bit different in size and layout (like the corner square of tulips in the border examples below). You can use these features for the four corners, as designed, or you can change it up and, instead, put them in the center of each side.
When evaluating a border pattern, remember that the examples given in the pattern are just that--examples. Don't be afraid to try something different.
Easier than you think!
In our tutorial, Alphabet 123s, we show you creative ways to adjust your cross stitch letters to fit into your available design space. It is similar when working with cross stitch borders.
Sometimes, it's as easy as repeating a border segment until you reach your needed length and width. But more often than not, you'll also have to make smaller, more minute adjustments, to get to your desired size.
The finished length and width of the border, framing your central design, then, depends on how you combine the various elements. In the "Forever Tulips" examples below, see how easy it is to make the adjustments needed to achieve the right border size:
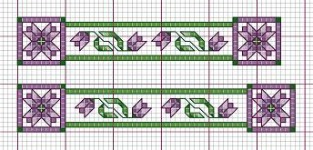 The bottom border is made longer by adding space between the tulip segments.
- If you need several spaces, but not enough to repeat an entire tulip segment, put two blank spaces in between each element, instead of one.
- Likewise, you can gain just a little by increasing the space between the last repetitive tulip and the corner motif.
- You can change the size and the look of your cross stitch border by changing the location of the special features. Take the special motif in each corner and move it, instead, to the middle of each side.
- With the motif moved to the center, you can make further adjustments by how you create the corners.
- Look at the examples to the right and you'll see that some of the tulips face one direction, while other are the opposite. Even flipping elements horizontally and vertically and fitting them together creatively can change the final dimensions.
.
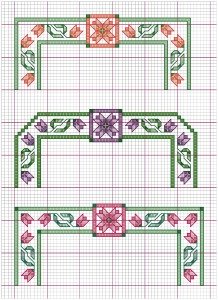 Each border is 2 spaces wider than the one above it.
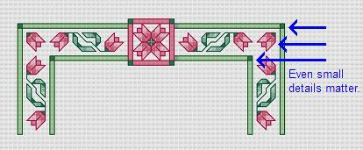 A flower fills in the space and a single dark stitch in the corners make a big difference.
- Fill in any spaces that seem "empty." Notice
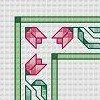
an additional tulip bloom placed inside each corner of the pink border.
- Small touches, like the dark green accent on the inside and outside corner, make your changes have a more "finished" appearance.
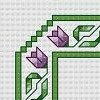
- Once you have the border in the size you need it, try out other design touches that don't affect the final dimensions. These two purple borders on the right are identical on the outside edges, but the inside corners are different.
- Be sure your changes are consistent with the overall design. Here, the stairstep corners complement the pointed tips of the tulips. With softer shapes, you might try a different approach.
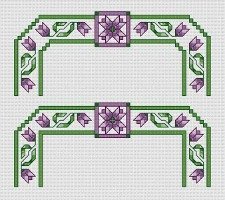 Instead of filling an empty corner, you can alter the shape.
Good borders give you a lot of flexibility - you can make one of the changes or make several of them. Just remember to be consistent by making the same adjustments throughout the entire length of border.
Our cross stitch border patterns
We provide our patterns in PDF format. Although it is present on most computers, if you are not familiar with Adobe Reader, click here to see our instructions page for how to obtain this free PDF reader.
Click here for Cross Stitch Border Pattern "Forever Tulips"
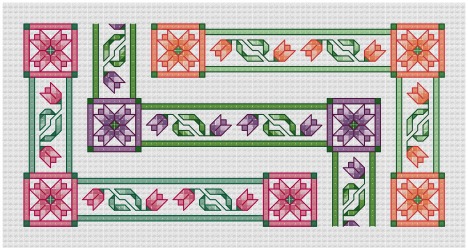
To help you with your cross stitch design projects, click to print our free cross stitch graph paper.
We pride ourselves on our large collection of readable cross stitch alphabet patterns.
