Cross Stitch -
6 Important Steps to Getting Started
Successfully learning any new craft means getting started with the right tools and the right information. And even though the best part of cross stitching is, well, the actual stitching, don't skip these important steps.
Explore every link, diagram, how-to before you stitch, or scan them quickly then come back when you need to. You'll see an example of items discussed via an Amazon listing, where you can click for more detailed information.
Everyone's journey is different, so let's get started on yours!
Step 1 - Getting started with a design you're excited to stitch
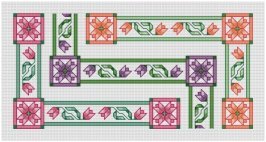
Even if you've never cross stitched before, choose a design that you really like. You will be more likely to learn the craft and work through setbacks if you're stitching a pattern you can't wait to see finished. Remember that even specialty stitches can be mastered one stitch at a time. Click here to see our free cross stitch patterns.
If this is your first cross stitch project, and you are choosing a kit that includes the fabric, I recommend getting started with one that uses 14-count or 11-count fabric. The smaller the number, the larger the "squares" (and holes!).
Step 2 - Gathering your cross stitch tools
Do you have the basic cross stitch tools? I recommend getting started with the minimum number of reasonably priced items, then adding others after you have some experience stitching. There are lots of bells and whistles you can get, but what do you really need?
Getting started with the right tools
- Needle Threader (click here to see why my favorite needle threader is a "yarn" threader)
- Needles (click here to learn more about needles)
- Embroidery Scissors (click here to learn more about embroidery scissors)
- Fray Block (click here to learn about Fray Block)
- Magnifying Device (even if you have excellent eyesight, this reduces eye strain)
- Good Lighting (a magnifier combined with light can go with you anywhere)
The links below give you a quick and easy way to see these tools. For more details, click on an item and a new tab will open. You can learn more details and read reviews from stitchers like you. For more choices, you can check out our Amazon store, better cross stitch supplies.
Inexpensive extras that are nice to have
Pick up a small package of plastic bobbins and a couple of metal rings. For just a few dollars, you're getting started with an easy and inexpensive way to keep your floss clean and organized.
- Plastic Bobbins
- Metal Rings
Then, without a lot of money invested, you won't hesitate to explore other methods if you feel the need.
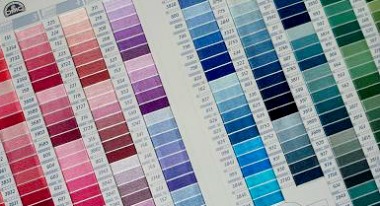
Early on, I started using plastic bobbins for my embroidery floss, and I still use them today. I store the bulk of my inventory in plastic cases, organized to follow the DMC Color Card (click here to read my blog about DMC Color Cards). I remove the ones I need for each cross stitch project, putting them on metal rings in a manner that makes sense for that particular chart.
So what about hoops, scroll frames and Q-Snaps?
I stitch without a device holding my fabric. I use the sewing method with as many stitches as possible, and a taut fabric makes that difficult. However, many stitchers do use these devices. Getting started without them may give you a better feel for whether or not it's a tool you really need.
Step 3. Reviewing your cross stitch chart and instructions
Good cross stitch pattern instructions should tell you everything you need to have and everything you need to know in order to complete your cross stitch project. You can eliminate surprises by reading the directions before you begin stitching.
Confirm that you have the necessary tools and supplies.
Identify any unfamiliar stitches in your chart. Our cross stitch how-to diagrams are detailed and easy to understand, so to check them out before getting started on stitching your cross stitch project. Come back when you need a refresher.
Step 4. Collecting your cross stitch supplies
If you're getting started with a cross stitch kit (pre-assembled with fabric and floss), you may already have everything you need to complete your project. If you choose an individual cross stitch pattern, you'll need
- Fabric or other cross stitch surface (like bib, bread cloth, towel-whatever your cross stitch is designed for)
- Floss
- Some cross stitch designs call for additional items or embellishments, such as specialty floss or blending filament, beads and ribbons
Step 5. Selecting and preparing your fabric
Measuring and cutting your fabric
If you purchased a cross stitch kit and want to use the fabric provided. Skip to the section below "Preparing your cross stitch fabric."
If you selected a cross stitch pattern only, you can either
It's typical for stitchers to either want to use fabric with a specific thread count (like 14-count aida), or want their finished design to be a specific size (such as 8" x 10")
To figure either of these measurements, you must convert stitch count to inches. The information in our handy stitch count table page will coach you through calculating fabric size. But before you cut your fabric, consider
- how you will display the finished piece (will it be framed, sewn to another item, etc.), and
- how many inches will you need to add to the fabric surrounding the design to accomplish this
The secret to always having enough? Start with the size of the pattern. On all sides, add the extra you'll need to frame it, sew with it, or whatever. Then add some more. It's much better to have to cut away a little extra than to come up short after all your hard work.
Then do what carpenters do, measure twice, cut once!
Preparing your cross stitch fabric
Don't skip these important steps. A little extra time preparing your fabric will save you time and frustration while you cross stitch.
- Treat the outside edges of your fabric to prevent fraying
- Find and mark the center
- Baste in gridlines to match the gridlines on the pattern (optional on very small patterns)
For details and diagrams on these on how to complete this process, see our how-to page on preparing fabric for cross stitch.
Step 6 - Selecting and preparing your floss
Choosing floss colors to use in your cross stitch pattern
Your cross stitch pattern has a key, or a legend, assigning a symbol
for each floss number. You can use the floss colors indicated on your
chart, or you can substitute ones of your own.
Imagine that you are stitching a beautiful cross stitch design for Mom. It features roses using five shades of yellow from dark to light., but Mom's favorite color is pink. This is where a DMC Color Card is invaluable.
When you substitute floss colors, you can simply write the numbers of your alternate colors beside
the symbols on your pattern legend. Or, for intricate patterns using many floss colors, I rewrite entire legend. On a clean sheet of paper, I carefully
- copy the symbol and its assigned floss number
- next to each, I write the number of the floss color I will be substituting (Why include the old number? Because sometimes a pattern will give special instructions based on the floss number, without including the symbol.)
- cut a 1/2" piece of the floss and tape it next to its number/symbol
A little bit of extra time in this preparation stage pays off later in faster, easier stitching with fewer mistakes.
If your cross stitch pattern is not elaborate, but you still have a few floss substitutions, make a photocopy of the chart and mark your changes on it. This step preserves the original cross stitch chart for future use.
What about laundering floss?
This is a confusing topic! Many floss manufacturers claim that their floss is will not run. At the same time, those same companies do provide instructions for laundering their floss prior to stitching. So which is it?
Here's my personal experience with floss colors running:
As I was getting started with my cross stitch baby hearts, I would pin the completed squares upon my wall. Looking up one day, I noticed that the heart border around my Rubber Ducky seemed to be losing definition. Upon closer inspection, I realized that the DMC Orange #947, used for the heart border, was bleeding into the white Aida cloth. The only moisture that had contact with this piece was the steam from my iron and the humidity in the air.
Horrified, I immediately cut a large strand of that same floss and I ran it under the tap. When I pressed it between the folds of a white towel, it did bleed. Thankfully, I discovered this before I stitched onto the afghan itself.
I had expected to be able to tell you that, to date, I'd never had my floss colors run. And since many of my projects are decorative, this still has not had a big impact on me.
In my research, I discovered several discussions on this topic. They seem to attribute floss running to recent ecological standards that have banned some of the chemicals once used to make the floss colorfast
So now, if you will be stitching a design on something that will be worn or washed, I now recommend you launder the floss before stitching, particularly the darkest, brightest floss colors. "Better safe than sorry," certainly applies here.
Floss coverage and the number of floss strands
If you're using fabric with a different thread count, you may need to adjust the number of strands of floss you'll use. There is no hard a fast rule about how many strands you should use on varying fabric counts. I've seen several tables, but each one is different.
Remember that cross stitch is more art than science. and floss coverage it is a matter of personal taste. Check out our Floss Strand Coverage page to see some examples, then pick the one you like best. Still uncertain? Work a few cross stitches in the corner of your fabric to decide which looks best before getting started on your main stitching.
As you use each floss color
- cut the floss into strips of 15 to 18 inches
- separate the strands, one thread at a time
- then recombine them in the number of threads you will use
This makes for fuller, thicker stitches. Click here to see a tangle-proof way to separate floss.
Now you're ready to start stitching!
If you've completed these steps, you're now ready for the best part of your journey - working on your cross stitch design! Remember to check out our tutorials to learn the various stitches you'll be using.
Below, you can review the Amazon listings for the supplies discussed. You can find more options in our Amazon store - click here to visit better cross stitch supplies.
Thanks for checking out these great products from Amazon! The commission I earn, at no cost to you, helps me bring this website to you free of charge. --Katherine


