How to Daisy Stitch Your Way to Flowers or Beautiful Borders
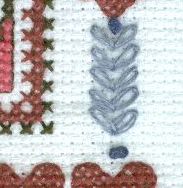
The daisy stitch, lazy daisy or "detached chain stitch," can be used for more than just flowers. Stitch them end to end as a decorative border or to fill an area with texture. Include them in samplers or frame areas of a birth announcement or wedding record.
Combined with other stitch types, they can resemble vines, stems, chains... You'll come across many variations in patterns, but the basic stitch is the same. The design on the right called for an extra loose stitch.
Learn how to daisy stitch, and you will have an important tool in your toolbox.
How to make a daisy stitch
 |
 |
|
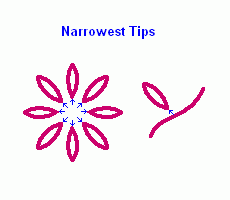
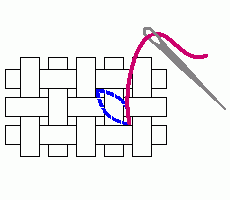
1. Locate the narrowest tip. |
If several are arranged to represent a flower, the narrowest tips will be the ones closest to the center. If it is to resemble leaves, it will be the one closest to the stem. |
 |
(This is intentionally blank so the next two steps can be viewed together.) |
|
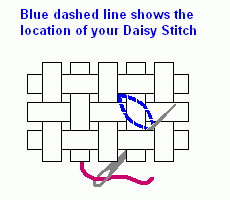
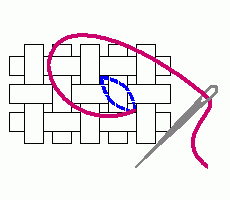
2. Bring your needle up from the back to the top at this point. | |
 |
 |
|
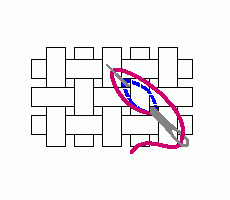
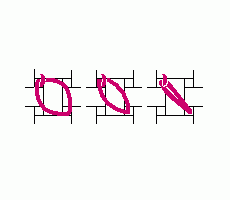
3. As you bring your needle around for the next stitch, encircle the daisy design with the floss. Then insert the needle... |
4. ...into the same hole and out the opposite end of the petal, with the floss looped under the tip of the needle... |
 |
 |
|
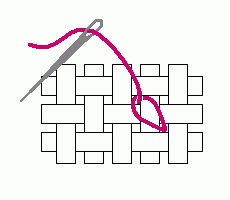
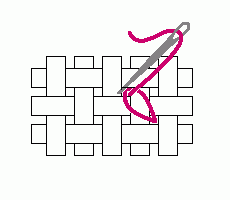
5. Pull the floss through and adjust the tension to get the result you want. |
Looser tension will give your petal a rounded look. More tension will make the ends more pointed. Too much tension will close the center and you will lose the petal shape. |
 |
 |
|
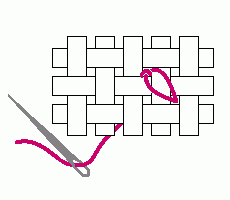
6. Insert the needle into the fabric very close to where the floss is coming up. This creates a small loop over the end, holding the petal in place. |
This creates a small loop over the end, holding the petal in place. |
Now you have a stitch that you can use to represent a whole host of things, real or imagined.
If you have a comment or question about this lesson, or if you would like to suggest a new one, please go to our Contact Us page. (We promise not to use your email address for any other purpose.)
Home › How to Cross Stitch › Daisy Stitch
