How to Make a
Three Quarter Stitch
While the three quarter stitch may look somewhat exotic at first glance, if you can do a half stitch and a quarter stitch, this one will come easy.
It begins with a quarter stitch. To finish it, simply add a half stitch (full diagonal) perpendicular to the quarter stitch.
Like other partial stitches, these are used to smooth edges and round corners. Designers place them along the outer edge of a design or within a large group of full cross stitches.
How patterns represent them varies, and some details of how they are made may be left up to you. As always, review the entire pattern and instructions first, and decide how you will embroider them. Then just be consistent throughout the entire project.
On the color key or legend for your project, these stitches will be listed in the same way as other categories of embroidery, similar to backstitches and straight stitches. Each floss color will be represented by a different symbol. The legend will specify the number of strands to work with and the direction of each stitch.
Partial stitches can slant in any direction. Just adapt the following instructions to fit the pattern.
Decision alert! The symbols may look exactly the same as for quarter stitches--a square (that may, or may not be divided by a diagonal line) with a miniature symbol in the appropriate corner.

The designer may not have used a different symbol, nor listed the three quarter stitch separately. In these cases, evaluate the stitch in context, and decide for yourself whether a quarter or three quarter stitch will look best.
The example below shows directions for this symbol.

Regardless of the direction of the slant, I usually stitch the quarter stitch first.
Make a three quarter stitch
 |
 |
|
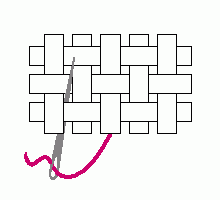
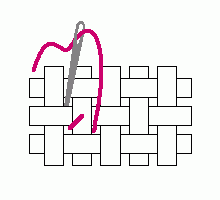
1. In this example, locate the corner of the short side, and bring the needle up through the fabric. |
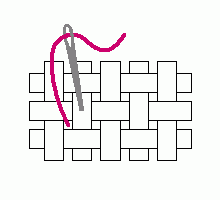
2. Crossing diagonally, insert the needle at the half way point, and pull the floss completely through to the back. |
 |
 |
|
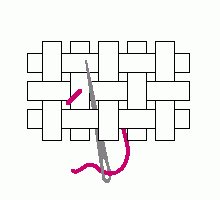
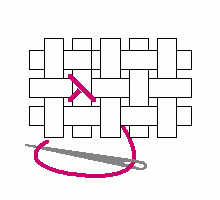
3. For the full stitch, bring your needle up through the fabric, in this example, in the lower right corner. |
4. Crossing diagonally to the opposite corner, insert your needle and pull the floss completely through to the back. |
 | |
|
5. Your stitch is complete. |
How to combine stitches
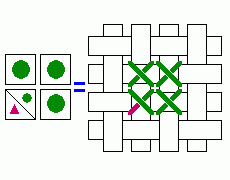
You will often see quarter stitches and three quarter stitches combined in the same square. On the pattern, a cross stitch square will be divided with a slanted line. Each half will contain a miniature version of the full-sized symbols appearing in adjacent same-color squares.
The square will look similar to one of these.

As with quarter and three quarter squares, the designer may not have indicated which side is intended for which stitch. In these cases, just evaluate the appearance that would result on your actual stitched project, and make a choice.
The steps below would be represented this way on the pattern. I usually stitch the smaller stitch first.

 |
 |
|
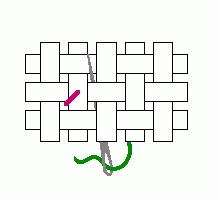
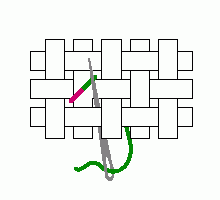
1. After completing the quarter stitch, begin at the opposite corner and bring the needle up through the fabric to the front. |
2. Crossing diagonally, insert the needle at the half point into the same hole as the existing stitch. Then pull it all the way through. |
 |
 |
|
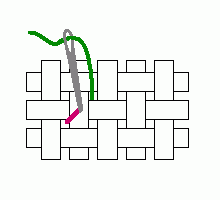
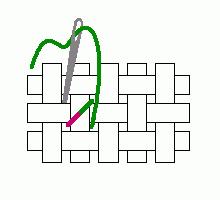
3. Now, bring the needle up through the fabric to the front at the lower right corner. |
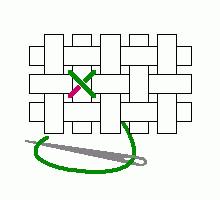
4. Crossing diagonally to the opposite corner, insert the needle and pull the floss completely through to the back. |
 | |
|
5. Your combination stitch is finished. |
Following the pattern on the left below would result in the stitches on the right.
With a little practice, combining stitches will become automatic.
If you have a comment or question about this lesson, or if you would like to suggest a new one, please go to our Contact Us page. (We promise not to use your email address for any other purpose.)
Home › How to Cross Stitch › Three Quarter Stitch
